


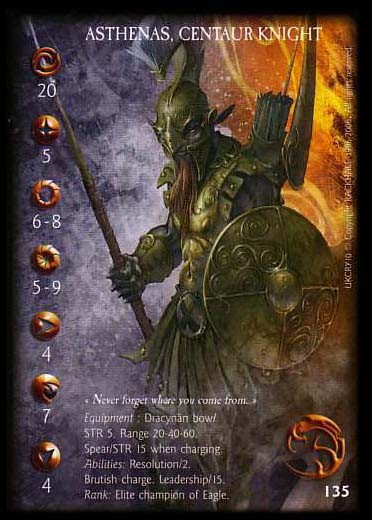
Profile to be created:
Basic miniatures:
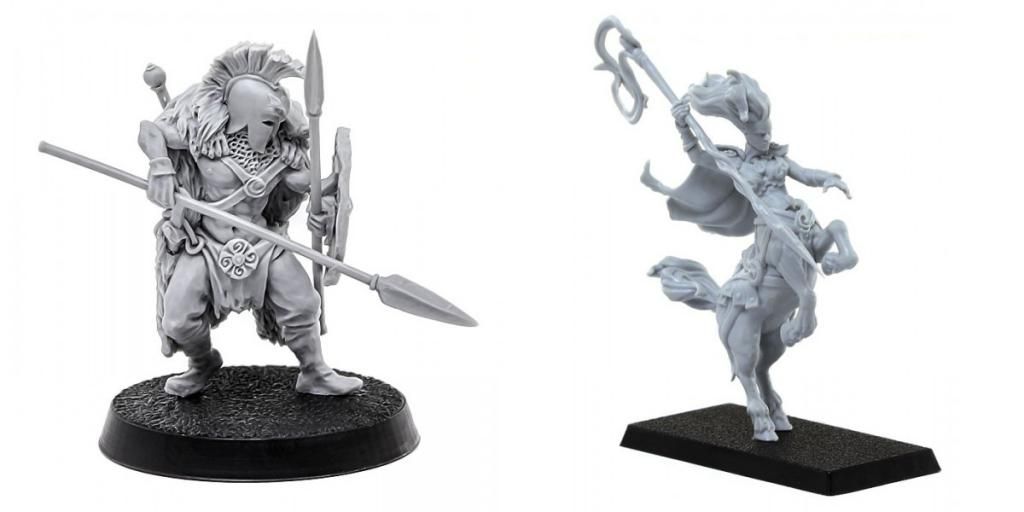
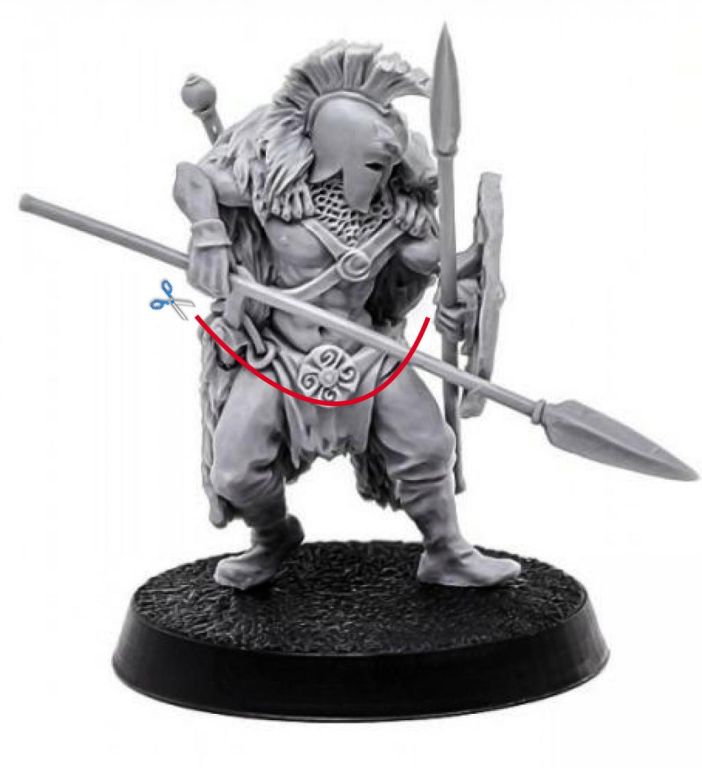
I used the two original miniatures above from the signumgames.com website.
Why? Firstly, because I didn't like the existing miniatures, and secondly because I wanted a miniature that represented movement well, like most Rackham miniatures. I could have used Baal, but he's not easy to find and it would have been a shame to cut up such a beautiful piece that I could have used with my Sessairs.
So I found what I was looking for with these two miniatures.
Might as well have two profiles:
Step 1: make sure you have two profiles in one for the Concorde, i.e. an Asthenas profile while keeping the Confédé profile of Rhiannôn (especially since, given their cost, it will be difficult to play them at the same time).
To do this, I simply pinned Rhiannôn's bust so that it could be removed.
So it's not complicated to do.
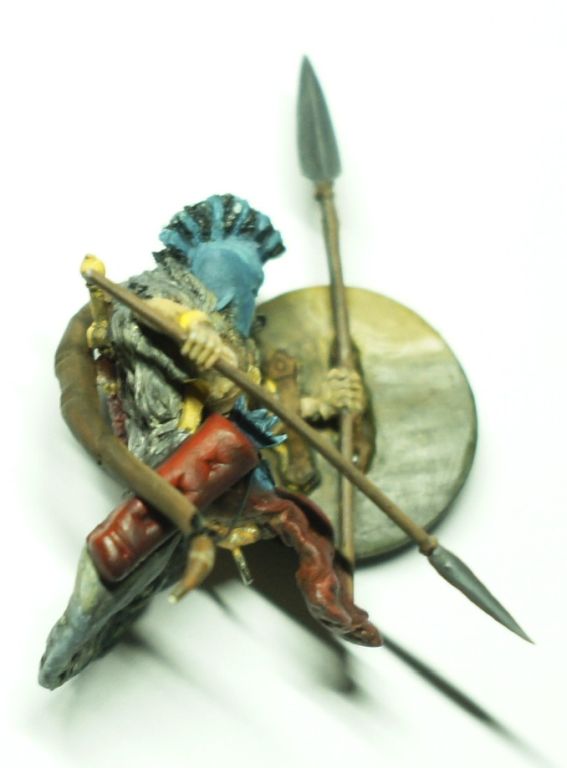
Centaur body:
Step 2: adapt the Spartan figurine to Rhiannôn's centaur body.
This is where it gets complicated, because you really need to create a joint between the two without it being visible.
So we have to cut the Spartan's legs, leaving a sort of cone at the base of the torso so that it fits properly into the hollow body of the centaur and the tiger. As the cone created was not necessarily the right size, I filled the space with green sculpting clay.
Refining the junction between the torso and the body:
Step 3: Add a skirt to accentuate the movement, reinforce the impression of a single piece without separation, and even hide imperfections at the junction between the Spartan's torso and the centaur's body.
To do this, use green stuff, which is less brittle than Milliput and more flexible.
Adding details:
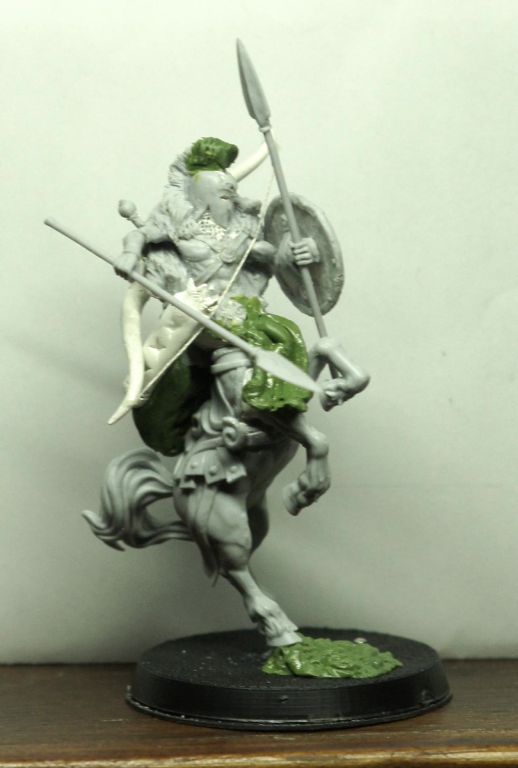
Step 4: Add the missing details.
Having tried to make a mold of the figurine so as not to damage it, I used a blue paste that softens under hot water and hardens as it cools. Unfortunately, the result was mediocre and it broke the crest of the helmet. So I had to fix it with green stuff.
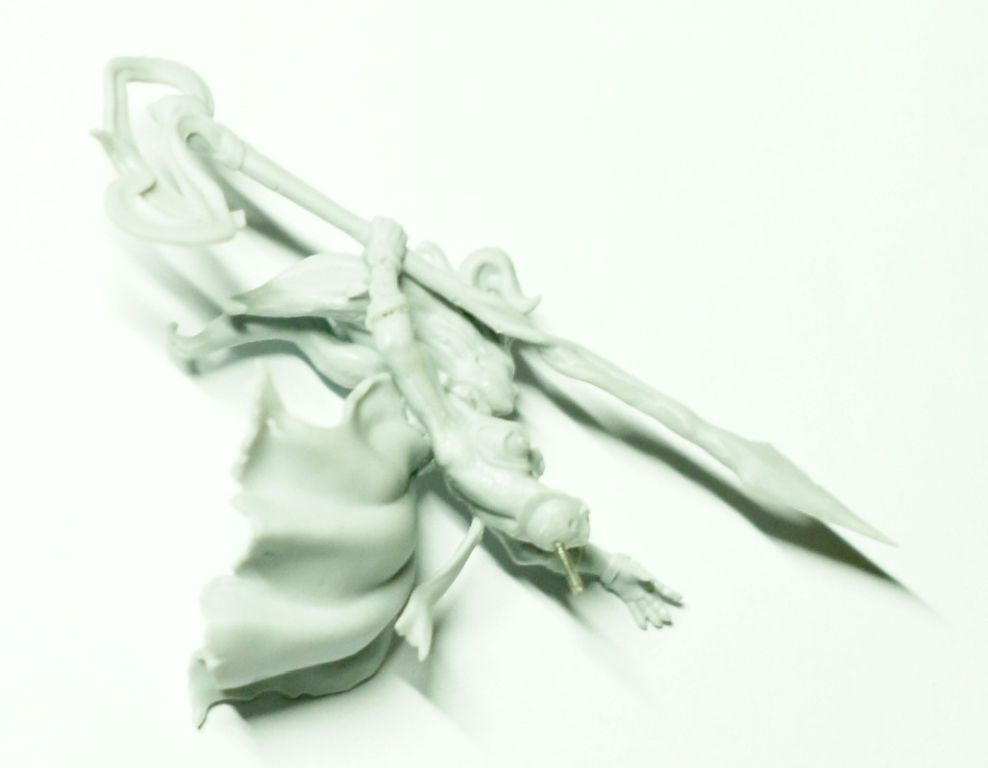
Then I used Milliput to make a bow (with a string made from sewing thread), a quiver, and arrows for the quiver.
When I was finishing it off and adding the string because it was getting in the way of my painting, one of the ends of the bow broke. So I plan to redo it using green stuff instead, and make it thinner because it's a little big compared to the Spartan's hands. It is attached to the back of the figure so that it stays in place and doesn't come off during transport or handling during play.
Improving the cape:
Step 5: Extend the wolf skin that serves as a cape because it had to be cut off part of the legs. To do this, use green stuff and try to maintain movement by sculpting it.
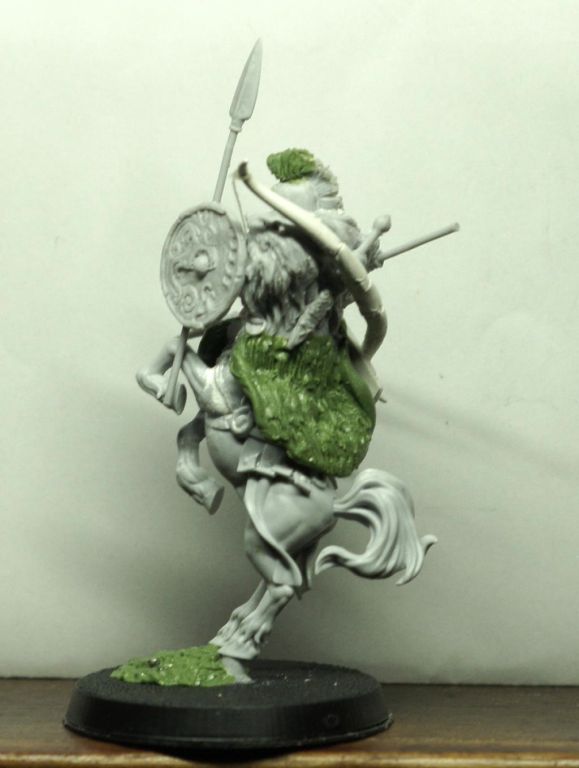
Modify the shield:
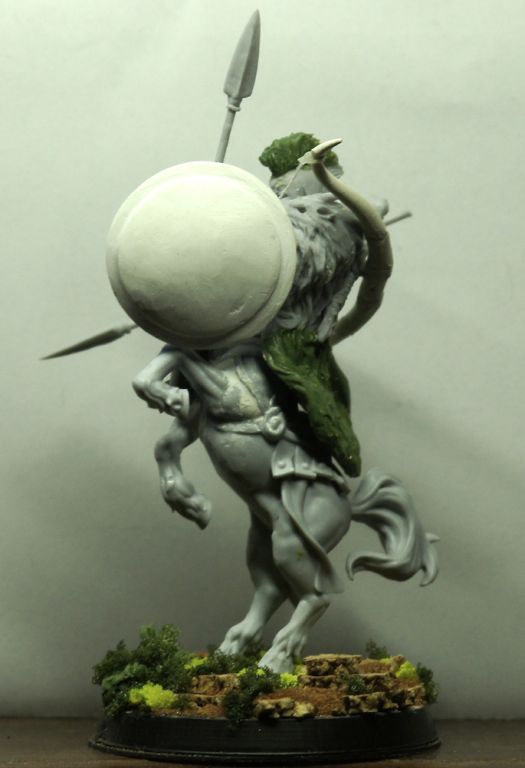
Step 6: Remove the existing shield, which looks more like a Viking shield, and replace it with a Greek-style shield. There are several types depending on the period.
I chose the most representative one: the Aspis.
However, to achieve a curved shape, at least on the outside, I had difficulty doing it by hand because it was not symmetrical.
So I used the one from the “Yh-Karas, King of the Abyss” figurine as a mold.
I could have used any other object with the right shape and size (navy jacket button, etc.).
To do this, use Milliput, which can be reworked after drying. I used fine sandpaper for wood to smooth the surface and make the shield nice and round. Creating the base: >
For the base, I used a few pieces of 1mm cork sheet cut by hand and stacked on top of each other, a tree trunk sculpted by hand in green stuff, synthetic moss of two different sizes sprinkled with glue, and a little fine sand to fill in the holes, and that's it.
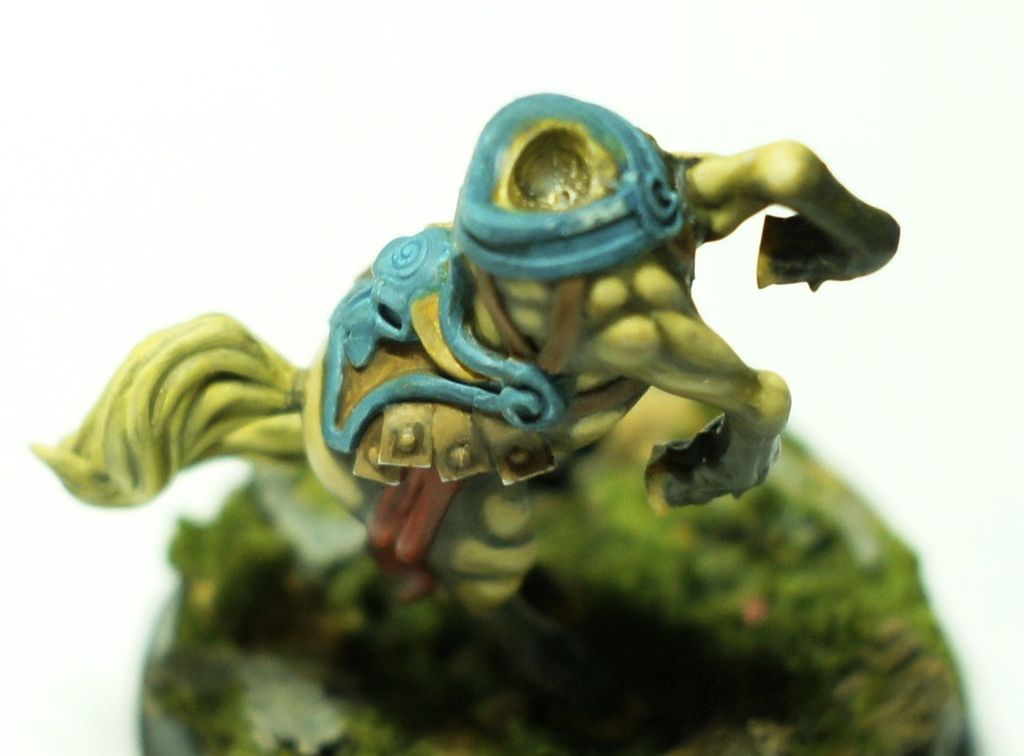
Painting the figurine:
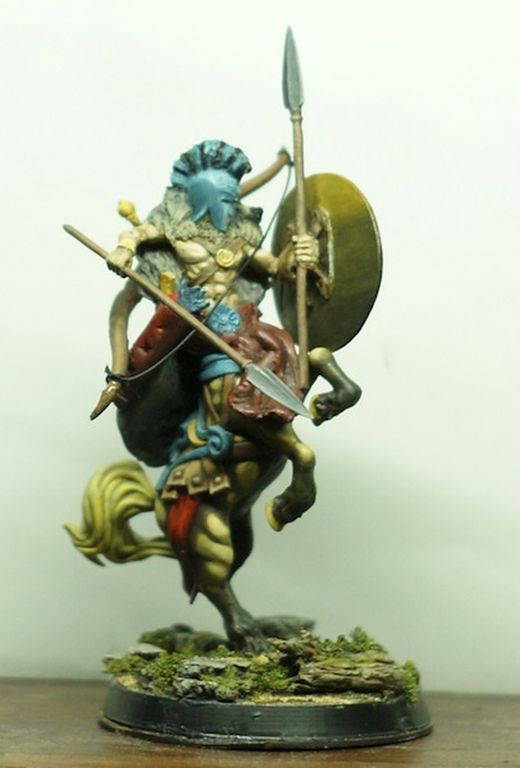
All that's left to do is paint, but that's not the easiest part, especially the shield, which has a large surface area and makes shading difficult because irregularities are much more noticeable.
Painting the figurine (continued):

One of these days, I'll redo the shield because this freehand bird isn't a great success.